


Drawing Coiled Ferns
- Emma Butler
- Aug 23, 2024
- 5 min read

Updated: Aug 26, 2024
The recent 'Sketching Wildflowers in Ink' workshops have got me thinking about other plants that can seem very complex to draw. Flowers, such as those from the dandelion family, often have so many petals that they seem impossible to tackle. Working out the pattern of the arrangement of petals, and then figuring out the guidelines to help scaffold your drawing are the key to success here. One of the workshop participants commented that she'd love to draw ferns in ink, so I thought I'd have a go at drawing a coiled fern, with its beautiful, but complicated fiddlehead shape. So grab your sketchbook, pencil and pen and draw along to create your own fantastic fiddlehead!
There are many different types of fern to be found on the Isle of Man and some species can be quite difficult to tell apart. Almost all the species unfurl as they form young fronds, however, with only the Adder's Tongue (Ophioglossum vulgare) and Moonwort (Botrychium lunaria) ferns not sharing this habit.


I decided to draw a fern using a few reference images, as I didn't want to get too bogged down in trying to make it look exact. I just wanted to get the rough pattern of a coiled fern (this coiled form is known as a 'fiddlehead' or 'crozier') so I can draw them more easily in future. There's nothing like sketching an object to really begin observing it and it can help to learn some of the anatomical terms for the parts as you sketch them. I find it helps to make sense of them so you can recognise them more easily in the future.

The above image is clearly of an unfurled frond, but the structures of this are very useful to bear in mind when drawing the curled form. All the same bits are there, they're just in a different shape and many are hidden.
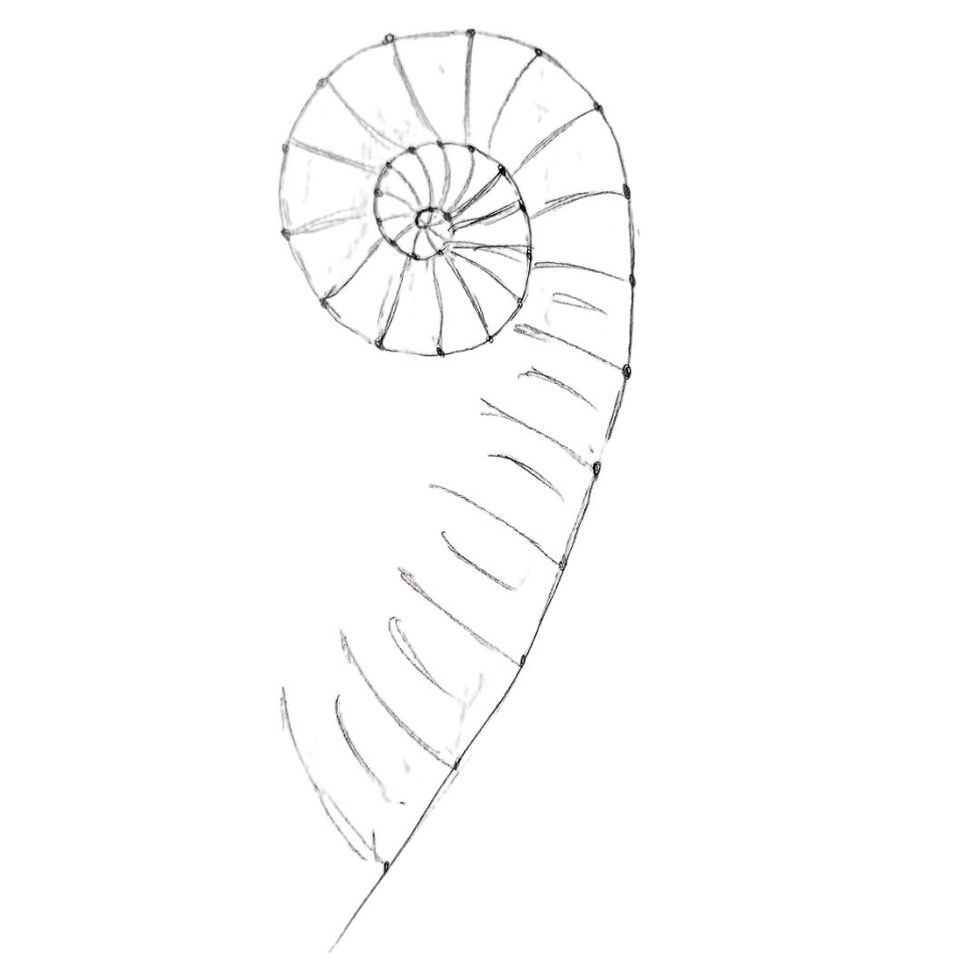
First, I draw a spiral shape with an elongated tail with a pencil. I had to experiment with this as I found I had to keep the spiral tighter than I had thought on my first couple of attempts.

I then added some dots to mark the position of the pinnae (the plural of pinna). The pinna are closer together at the top of the frond, which, in the curled form, is the centre of the spiral. I therefore drew the dots closer together here and made them gradually more spaced out as I moved outwards along the spiral. I found it was easier to work from the centre out than from the outer part of the spiral in, as the dots got too close together in the centre of the spiral when I started from the outside.

Now I added some slightly curved lines to show each pinna rachis (what I would call the stem of each pinna).

And a few of the pinna rachises (stems) from the other side of the fern, where they may be seen towards the bottom of the frond where it's more open. These are mainly obscured by the pinnules of the nearer pinnae later, but it's good to know where they are as they will be seen a little.
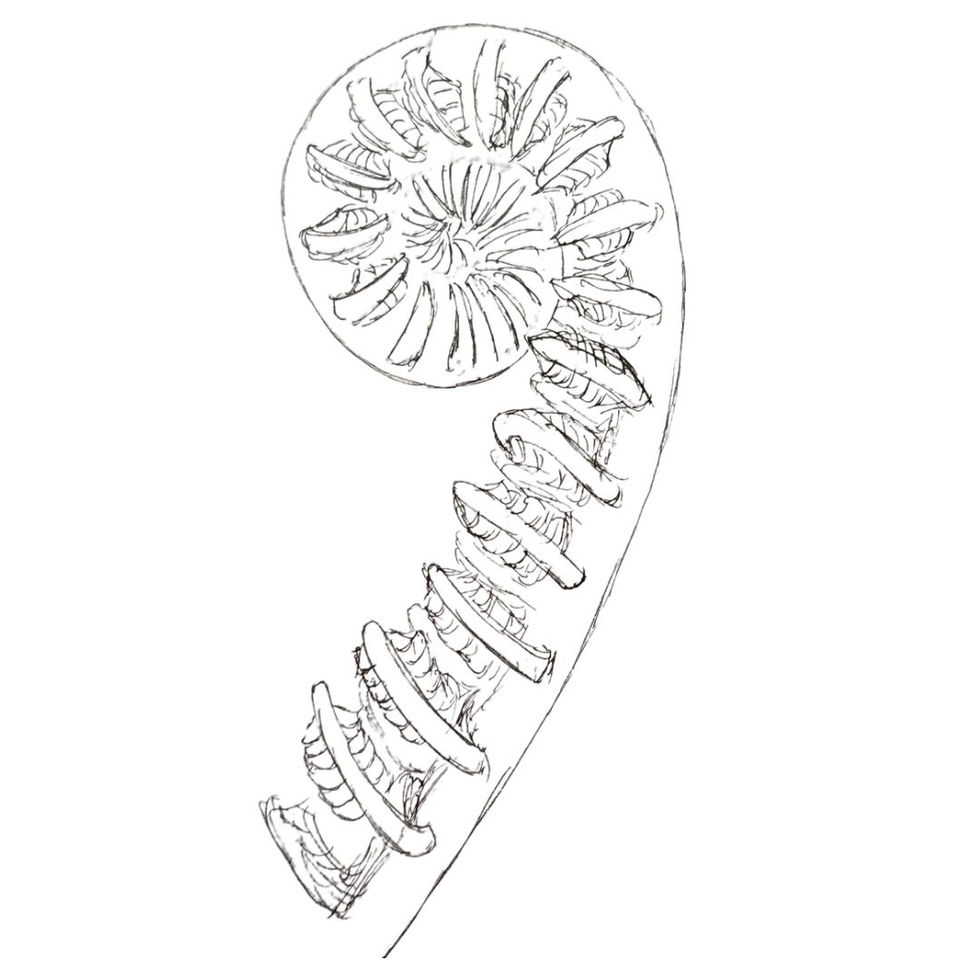
I then added the shape of the pinnules to each pinna. Sometimes the pinnae look like a coil and sometimes, as in this drawing, each pinna is seen from behind, so the pinnules form a block with tapered edges on each side of the pinna rachis (stem). Gosh this is sounding complicated! Basically draw a spiral with a tail, some dots getting closer as you move towards the spiral and then some angular leaf shapes coming from each dot so they fill the spiral. Oh, and thicken the main stem (also called a rachis) by drawing another line that follows the spiral.

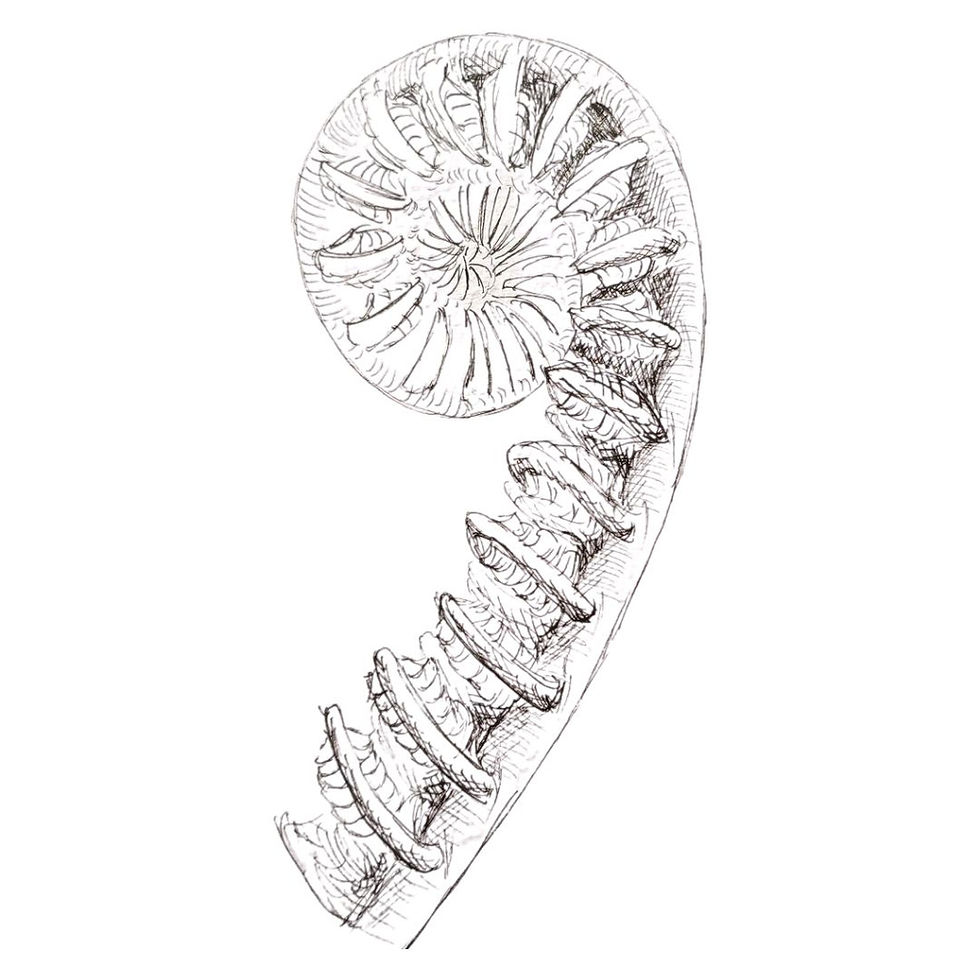
You should now have the basic fern fiddlehead structure and it's time to go in with the ink (if you're using it). The value of in is that you can now choose which lines you liked the best and rub out all the pencil when you're finished. I added the small lines to indicate the pinnules to each side of the pinna stems and rounded off the lines that showed the pinna on the far side of the frond, to make them look like they're curving towards me. You can't really see them much; it's just an indication that they're there.

If you used ink, rub out the pencil to reveal a lovely clean ink drawing.
Now begin to add shading between the pinna and hatching and contour lines to make it look like the main stem (rachis) is 3D. Remember to work out where the light will be coming from and keep this in mind as you draw the shadows.
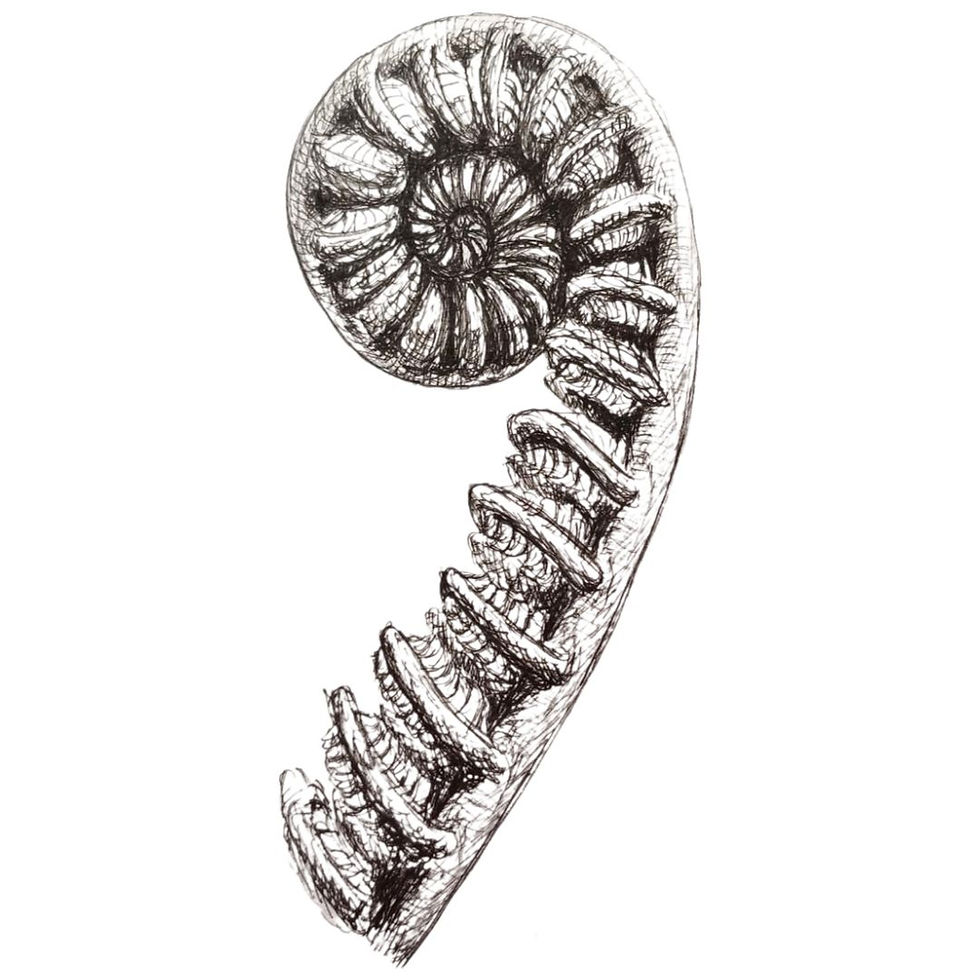
I chose that the light would be coming from the top right and so was careful to keep the outer line on the top right of the stem very light compared to the others. I did make this fern look a bit solid, I think, and it reminds me of an ammonite fossil. That's what practise is for though, and I'm sure I'll be in a better position when drawing ferns in future because I did this research and practice today.
I love to watch time-lapse sequences of plants growing and seeds germinating and, when I was in the classroom, I found this was the best way of engaging children right at the start of a topic on plants. It truly creates a sense of wonder at these amazing organisms. Ferns unfurling also makes for a great time-lapse sequence so I thought I'd include a couple links below:
Here's another link to a video of a fern in the woods. The main reason for including it is the gorgeous birdsong in the background!
To find out more about ferns the found on the Isle of Man, take a look at the Manx Wildlife Trust 'Ferns and Horsetails' page. For more information on ferns in general, The British Pteridological Society has a useful 'Introduction to Ferns' page.


댓글